Phase 1 Overview
Congratulations on the completion of Phase 0. Let’s take a look at what we have done till now.
Recap of Phase 0
- In stage 1, we built a simple TCP server that served a netcat client
- In stage 2, we created our own TCP client and made it communicate with the TCP server
- In stage 3, We experimented with UDP and multi-threading
- In stage 4, we made our TCP server support multiple simultaneous clients using epoll (concurrency)
- In stage 5, we combined the functionality of a TCP server and client to create a TCP proxy.
What to expect in Phase 1
Phase 0 gave us an introduction to Linux socket programming, Linux epoll, event loop and an understanding of how client-server communications take place. Using this knowledge, from Phase 1 onwards we will start to build eXpServer.
PRE-REQUISITE READING
Now is a good time to understand the capabilities and architecture of eXpServer. Read the following Architecture document before proceeding further.
PRE-REQUISITE READING
Read the following document about the Coding Conventions we will be using to implement eXpServer
There will be an apparent jump in the complexity of the code that we will be writing which is normal and expected. We will have to spend a bit more time than Phase 0 for this. Rest assured, this documentation will guide us throughout the process.
File Structure
The code that we have written so far for Phase 0 is a standalone practice session. Going forward we will be starting to build the eXpServer. The file structure will change considerably with the modularisation of code into multiple files and folders.
In order to maintain consistency, the documentation will be providing the expected file structure at the beginning of each stage.
Phase 1 Initial File Structure
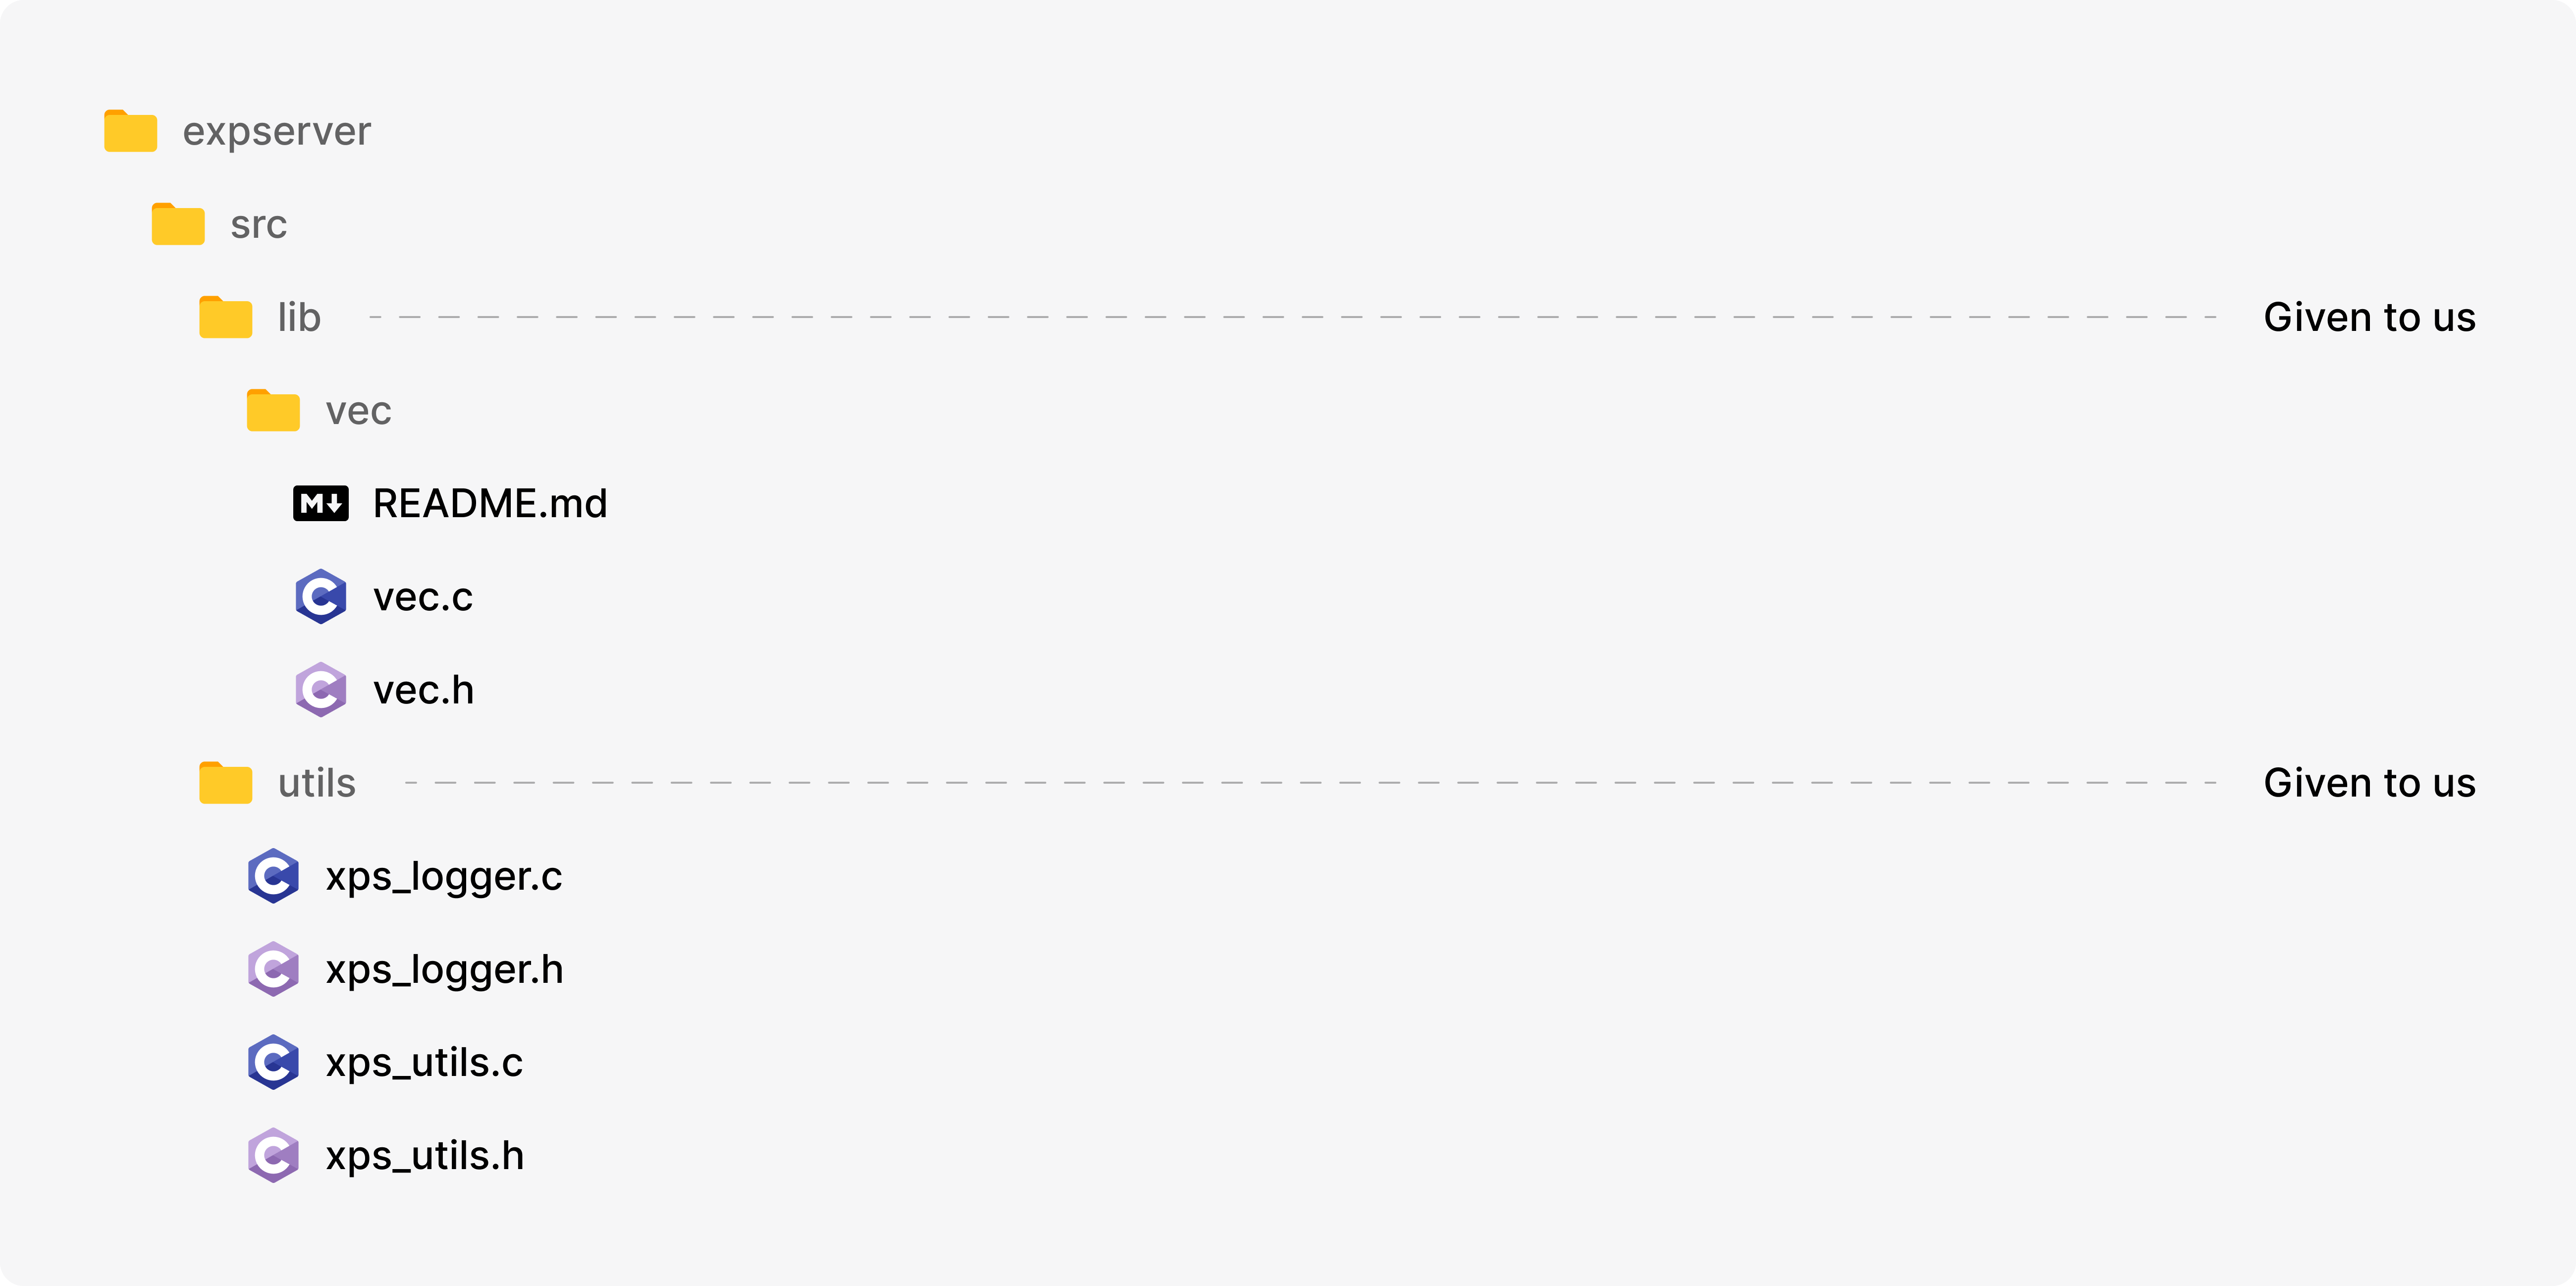
- We will be using a library called
vecthat provides a dynamic array implementation. Read aboutvecand get its source code here. xps_loggermodule provides a function to print log messages for debugging and other purposes. Read aboutxps_loggerand get its source code here.- From this point onward, the code will be independent of what was done in the previous stage. Begin by creating a folder named
srcwithin theexpserverfolder.