Stage 2: TCP Client
Recap
- In stage 1, we built a simple TCP server using linux networking APIs.
Learning Objectives
- We will implement a simple TCP client that takes an input from the user, sends it to the TCP server from Stage 1 and prints the response.
Introduction
Recall the previous stage where we relied on a third-party client, netcat, to test the functionality of the TCP server. In this stage we will focus on writing our own TCP client to communicate with the TCP server.
In both the client and server sides of a TCP-based system, socket programming plays a central role in enabling communication. So expect some code to repeat from the previous stage.
NOTE
Code snippets will contain comments in between with a format like this: /* todo */. These are meant to be filled in as you go through the documentation and implement it.
Implementation
Create a file named tcp_client.c in expserver/phase_0. All the code from this stage will be written to it.
The header includes and defines required for this stage are given below.
#include <arpa/inet.h>
#include <netdb.h>
#include <netinet/in.h>
#include <stdio.h>
#include <stdlib.h>
#include <string.h>
#include <sys/socket.h>
#include <unistd.h>

#define SERVER_PORT 8080
#define BUFF_SIZE 10000
Client connects to a server with the help of a socket interface, similar to how the server connects to a client. Thus we use the same socket() function to create a client socket.
int main() {
  // Creating listening sock
  int client_sock_fd = /* create a socket of type SOCK_STREAM */
But where (or which server) does this client connect to? To establish a connection, the client must know the IP address and listening port of the server it intends to connect to. We can use an object of struct sockaddr_in for this purpose.
  // Creating an object of struct socketaddr_in
  struct sockaddr_in server_addr;

  // Setting up server addr
  server_addr.sin_family = /* fill this */;
  server_addr.sin_addr.s_addr = inet_addr("127.0.0.1");
  server_addr.sin_port = /* fill this */;
INFO
server_addr.sin_addr.s_addr is set to the IP address 127.0.0.1. This IP stands for localhost ie. host machine. The inet_addr() function will convert string IP to required numeric format.
Now that we have the client socket and and the server address (IP and port), connect the client to the server with the help of the connect() function. Use error handling to handle cases of unexpected failure.
  // Connect to tcp server
  if (connect(client_sock_fd, (struct sockaddr *)&server_addr, sizeof(server_addr)) != 0) {
    printf("[ERROR] Failed to connect to tcp server\n");
    exit(1);
  } else {
    printf("[INFO] Connected to tcp server\n");
  }
Milestone #1
This is a good point to test the code you have written. Compile and start the TCP server that we wrote in Stage 1 and this TCP client on separate terminals.
WARNING
Make sure to run the server before you run the client.
Try to start the client before the server and see what happens.
The terminal running the TCP server should display the following message:
[INFO] Client connected to serverThe terminal running the TCP client should display the following message:
[INFO] Connected to tcp serverThis confirms that the client has established a successful connection to the server!
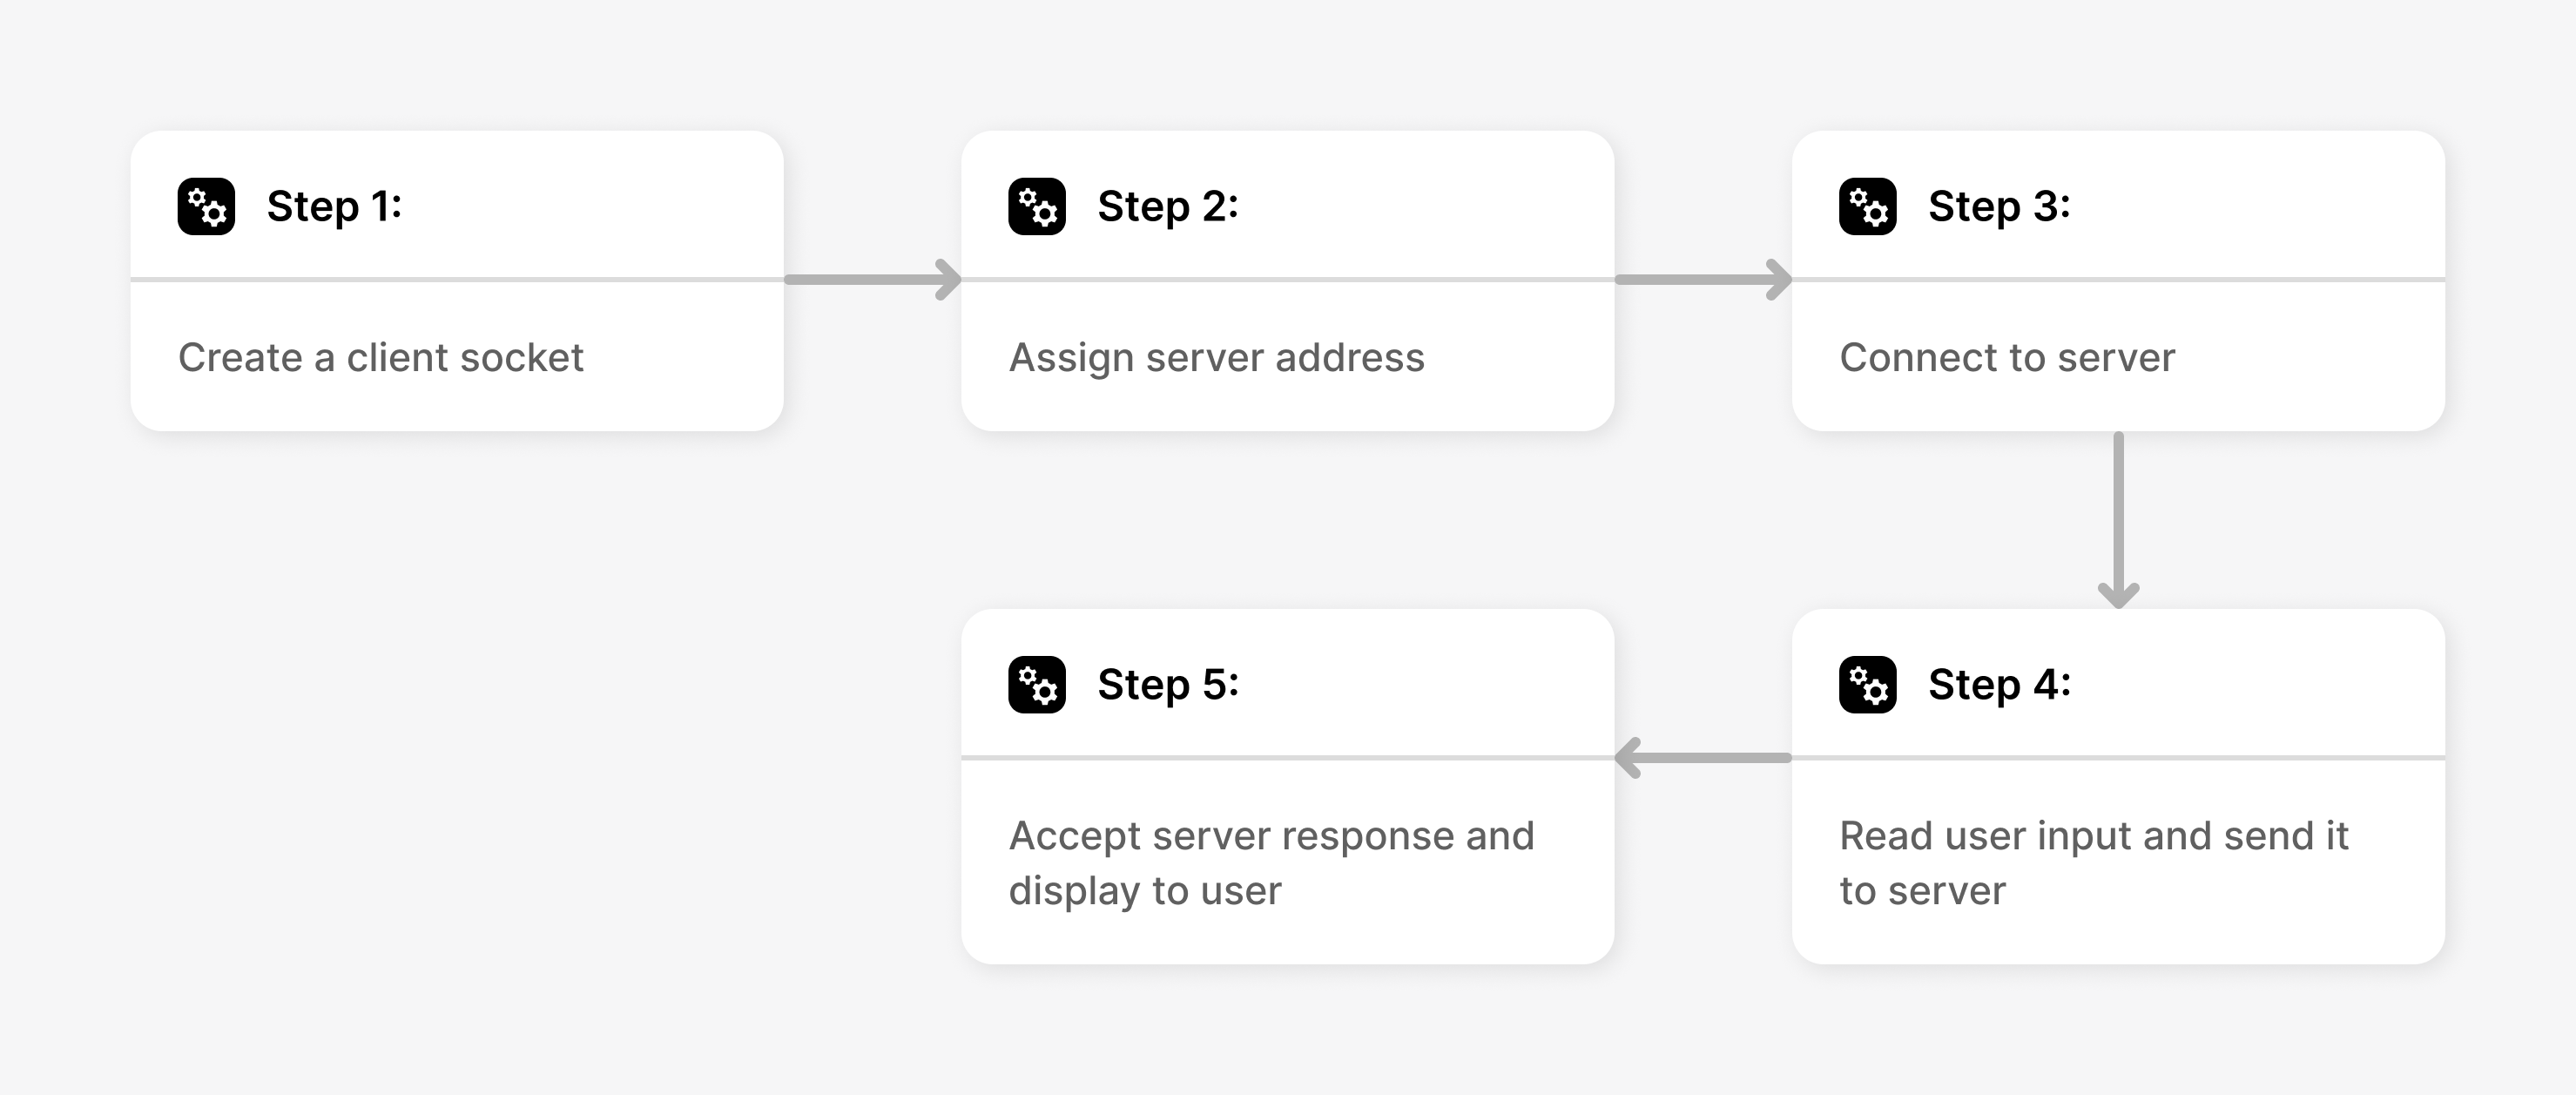
Let us now implement the functionality for the user to send some messages from the client to the server. The client code has to:
- Read the input from the user’s terminal
- Send the message to the server
- Read the message sent by the server (recall how our server sends the reversed message back to the client)
- Print the message from the server
  while (1) {
    // Get message from client terminal
    char *line;
    size_t line_len = 0, read_n;
    read_n = /* read a line from the user using getline() - https://man7.org/linux/man-pages/man3/getline.3.html */

    /* send message to tcp server using send() */

    /* create a char buffer of BUFF_SIZE and memset to 0 */

    // Read message from client to buffer
    read_n = recv(/* read message sent by server to client into buffer */)

    /* close the connection and exit if read_n <= 0 */

    // Print message from cilent
    printf("[SERVER MESSAGE] %s\n", buff);
  }

  return 0;
}
Milestone #2
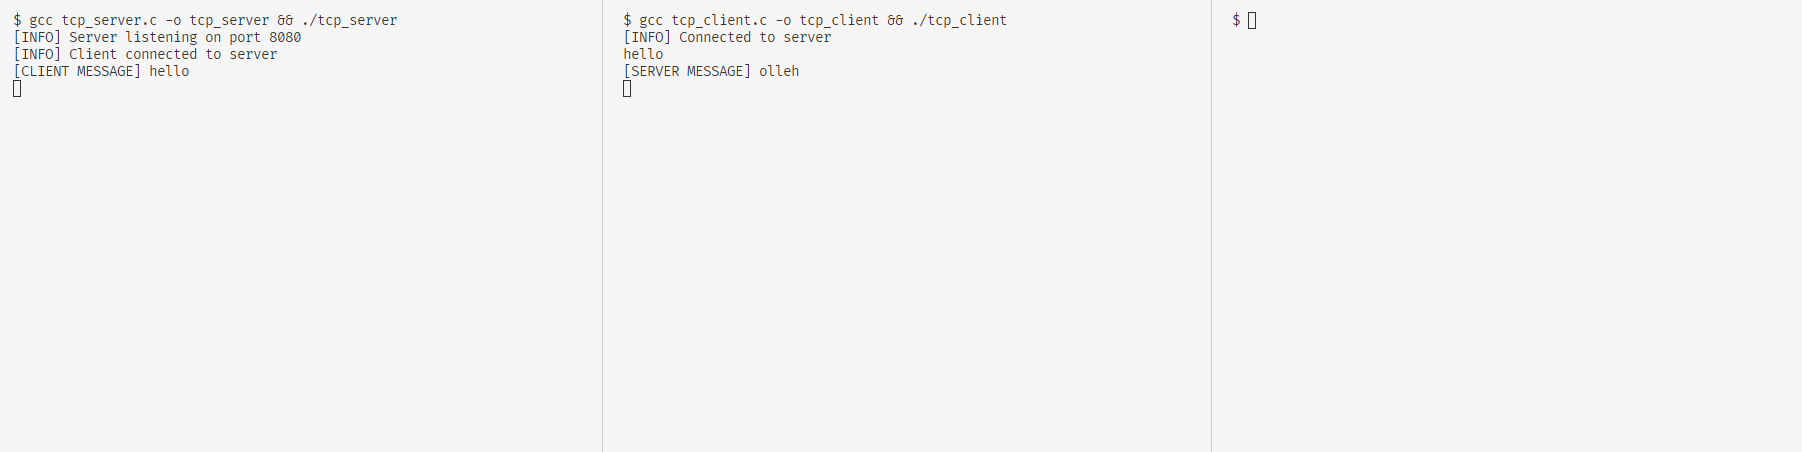
Again, start the TCP server and TCP client on separate terminals. You should get successful connection message on both terminals.
The terminal with the TCP server should display the following message:
[INFO] Client connected to serverType some message in the terminal running the TCP client.
[INFO] Connected to tcp server
hello
The server would receive the message sent by the the client.
[CLIENT MESSAGE] helloThe client terminal should get a response message (reversed string) from the server as a receipt.
[INFO] Connected to tcp server
hello
olleh
Experiments
Iterative and Concurrent Server
An iterative server is a type of server that handles client connections sequentially. This means that the server processes one client request at a time, completing the entire interaction with one client before moving on to the next. This contrasts with a concurrent server, which can handle multiple client requests simultaneously.
Experiment #1
What would happen when multiple clients try and connect to the same server? Let us test it out!
First, let's start the server in one terminal. Then, simultaneously, initiate a client instance in a new terminal. The client establishes a connection with the server, which confirms by printing [INFO] Client connected to server. We can then test the communication by exchanging messages between the client and the server, with the server responding with the reversed string, as done in Milestone #2.
Now, let's open another terminal and start a new client instance while the first one (client #1) is still active. Upon starting, this second client (client #2) attempts to connect to the server, but the server does not confirm the connection, failing to print [INFO] Client connected to server. Consequently, any messages sent from client #2 won’t reach the server.
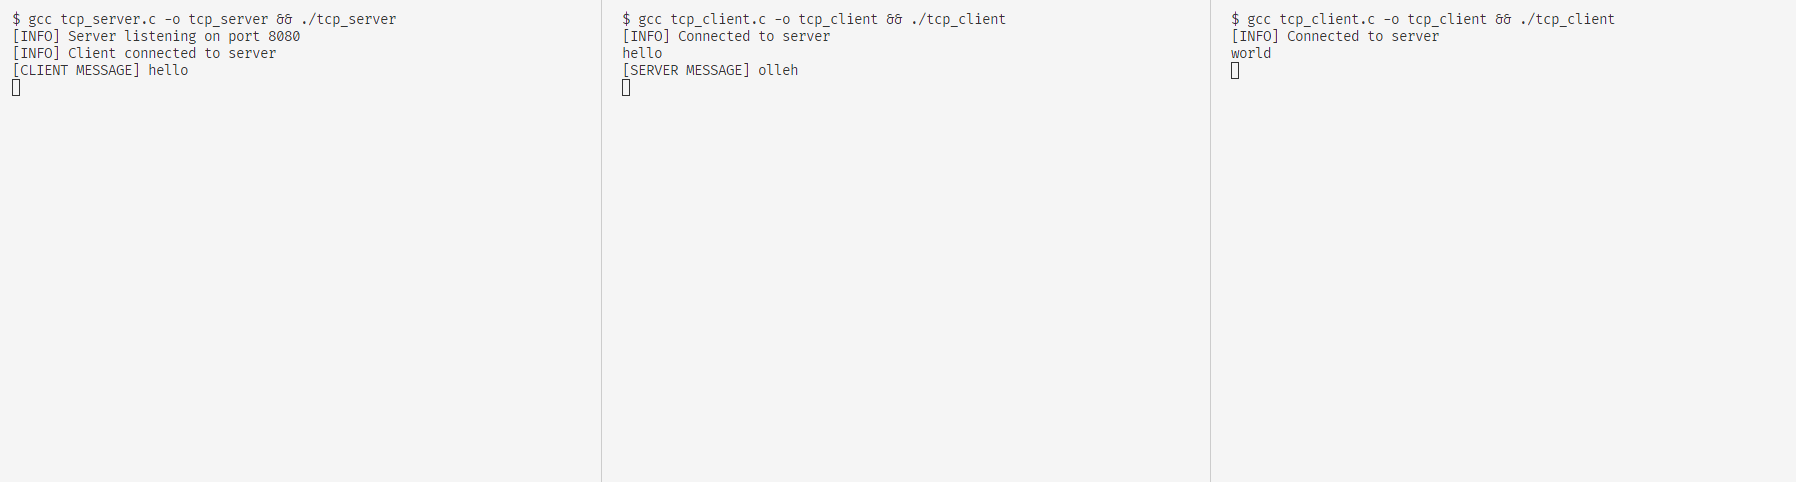
Meanwhile, client #1 remains connected. To verify the connection, we can send another message from client #1 to the server. The server will receive and process this message, sending the reversed string back to client #1.
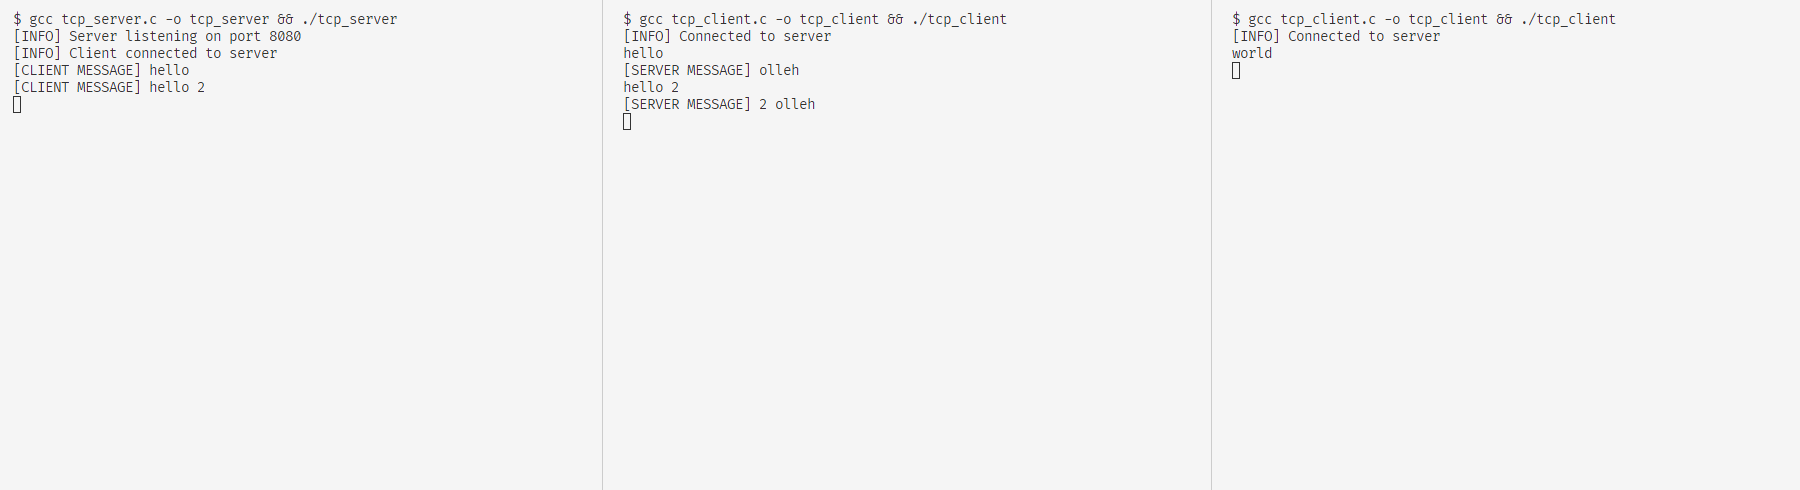
Think of why this is happening. We will fix it in the next stage. Close client #1 and try to send a string from client #2 to the server. Observe what happened and move to Experiment #2.
Experiment #2
Did you notice what happened when you closed the connected client instance? The sever also terminated with it. But what if we want the server to keep serving other clients?
Modify the code such that the server does not terminate immedietly after a client disconnects.
HINT
- A while loop around the accept and recv-send loop could help.
- Also break from the recv-send loop after each client disconnects.
Now, let us verify our modified code. Follow the same procedure in Experiment 1. We can observe the following:
- The server is not closed even after terminating the first client.
- Now, client #2 gets connected to the server.
Now, you can try connecting a new client after disconnecting the existing client. This can be repeated any number of times. So now the server is an iterative server. In the next stage we will make a concurrent server.
Experiment #3
Now,we can modify the client code for creating multiple clients in a single execution of client code. We would be using fork system call to implement this.
PRE-REQUISITE READING
- Read about Process and Threads
- Read about System Calls
Create a file tcp_multi_client.c and place it inside expserver/phase_0. We would be implementing our client code here.
Try to run the the modified server code from the experiment 2 and below client code written in the tcp_multi_clients.c file. Observe how multiple clients are created concurrently in a single client code using fork() system call and their corresponding output. Try to run it again by updating the number of clients created in the client code and observe how the server deals with it iteratively.
#include <arpa/inet.h>
#include <stdio.h>
#include <stdlib.h>
#include <string.h>
#include <unistd.h>
#include <sys/wait.h>

#define SERVER_PORT 8080
#define SERVER_ADDR "127.0.0.1"
#define BUFF_SIZE 10000
#define NUM_CLIENTS 3

void client_process(int client_id) {
    int client_sock_fd;
    struct sockaddr_in server_addr;

    // Create client socket
    client_sock_fd = socket(AF_INET, SOCK_STREAM, 0);
    if (client_sock_fd < 0) {
        perror("Socket creation error");
        exit(EXIT_FAILURE);
    }

    // Set up server address
    server_addr.sin_family = AF_INET;
    server_addr.sin_addr.s_addr = inet_addr(SERVER_ADDR);
    server_addr.sin_port = htons(SERVER_PORT);

    // Connect to TCP server
    if (connect(client_sock_fd, (struct sockaddr *)&server_addr, sizeof(server_addr)) != 0) {
        printf("[Client %d] [ERROR] Failed to connect to server\n", client_id);
        exit(EXIT_FAILURE);
    } else {
        printf("[Client %d] [INFO] Connected to server\n", client_id);
    }

    while (1) {
        // Hardcoded message "hello"
        const char *message = "hello\n";
        size_t message_len = strlen(message);

        // Send hardcoded message to TCP server
        send(client_sock_fd, message, message_len, 0);
        printf("[Client %d] Sent: %s", client_id, message);

        // Buffer to store server's response
        char buff[BUFF_SIZE];
        memset(buff, 0, BUFF_SIZE);

        // Read message from server
        ssize_t read_n = recv(client_sock_fd, buff, sizeof(buff), 0);

        // Client closed connection or error occurred
        if (read_n <= 0) {
            printf("[Client %d] [INFO] Server disconnected. Closing client\n", client_id);
            close(client_sock_fd);
            exit(1);
        }

        // Print message from server
        printf("[Client %d] [SERVER MESSAGE] %s", client_id, buff);

        // Exit after first interaction
        break;
    }

    close(client_sock_fd);
}

int main() {
    pid_t pid;

    // Fork multiple clients
    for (int i = 0; i < NUM_CLIENTS; i++) {
        pid = fork();

        if (pid < 0) {
            perror("Fork failed");
            exit(EXIT_FAILURE);
        } else if (pid == 0) {
            // Child process runs the client
            client_process(i + 1);
            exit(0);
        }
    }

    // Parent process waits for all child processes to complete
    for (int i = 0; i < NUM_CLIENTS; i++) {
        wait(NULL);
    }

    return 0;
}
Conclusion
Congratulations! You have written a TCP client from the ground up which connected with a TCP server with the ability to send and receive messages.
Recall the problem from Experiment #1. This limitation can be fixed using using two different methods:
- With multi-threading
- With epoll
In web servers like Apache, multi-threading was used for serving multiple clients simultaneously. Each incoming client request is typically assigned to a separate thread, allowing the server to serve multiple clients concurrently without blocking or slowing down other requests.
Whereas Nginx, a more recent web server compared to Apache, uses an event-driven architecture, which relies on epoll. Instead of creating a new thread for every new connection, a single thread is sufficient to handle multiple clients simultaneously.
eXpServer uses the latter method to achieve concurrency. In the next stage, we will explore the other method - multi-threading. The server will be using UDP sockets for connection. Both multi-threading and UDP protocol will not be used in the subsequent stages of the roadmap to build eXpServer. Thus skipping this stage will not affect the continuity of the subsequent stages of the project. However, these are important concepts in networking. Hence these ideas are explored.